How to fix a sliding closet door

- How to fix a sliding closet door
- Introduction – How to fix a sliding closet door
- Before You Begin: Key Considerations for a Sticking Sliding Closet Door Fix
- Essential Supplies for Your Sliding Closet Door Repair Toolkit
- Step 1: Inspect the Door and Track for Obstructions
- Step 2: Clean and Lubricate the Track and Rollers
- Step 3: Adjust the Door Alignment and Test Functionality
- FAQ: Fixing a Sliding Closet Door
Introduction – How to fix a sliding closet door
A sliding closet door that wont open can be a daily frustration in your rental, making it hard to access your clothes and potentially causing $50–$150 in landlord charges if the door damages the track or wall. For young renters, fixing this issue yourself can save money, prevent disputes, and fulfill your tenant maintenance tips responsibilities. At RepairBoom, we’re here to empower you with a simple guide to tackle a DIY closet door fix in just 30–60 minutes. Our mission is to help you maintain your rental confidently, ensuring your deposit stays intact.
This guide outlines three straightforward steps on how to fix a sliding closet door—inspecting the door and track, cleaning and lubricating the mechanism, and adjusting the door alignment—to resolve the issue efficiently. You’ll learn how to perform renter-friendly repairs without risking your lease, potentially saving $75–$200 in professional repair costs, as noted by HomeAdvisor. Download our free Sliding Closet Door Repair Checklist below to make your fix a success!
Before You Begin: Key Considerations for a Sticking Sliding Closet Door Fix
Repairing a sticking sliding closet door requires careful preparation to avoid complications or lease violations:
- Lease Restrictions: Review your lease for clauses on repairs; unauthorized fixes to fixtures may lead to $100–$500 deposit deductions if not approved by your landlord.
- Door Type: Identify if your door is top-hung (slides on an upper track) or bottom-rolling (slides on a lower track) to focus your repair efforts.
- Damage Risks: Forcing a stuck door can damage the track or wall, potentially costing $50–$200 in repairs, per Angi.
- Documentation: Take photos before and after the repair to prove compliance if disputes arise with your landlord.
By planning ahead, you’ll ensure a smooth repair process while meeting your tenant maintenance tips responsibilities.
Essential Supplies for Your Sliding Closet Door Repair Toolkit
Gather these renter-friendly tools (~$10–$20) to complete your DIY closet door fix:
- Basic Tools: Screwdriver (Phillips or flathead, depending on screws), adjustable wrench, and a small level to check alignment.
- Cleaning Supplies: Vacuum with a crevice attachment, rubbing alcohol, a cloth, and a small brush to clean the track.
- Lubrication: Silicone-based lubricant spray (e.g., WD-40 Specialist Silicone, $5–$8) for smooth sliding—avoid oil-based products, as they attract dirt.
- Documentation Tools: Smartphone for photos and a notebook to log repair steps.
These supplies ensure you’re prepared to fix the door without violating lease terms, protecting your deposit.
(Links posted are affiliate sponsored Links and purchases directly support our operation. We stand behind the products we recommend)

Step 1: Inspect the Door and Track for Obstructions
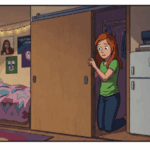
A thorough inspection is the first step to a successful renter-friendly repair, helping you identify the cause of the sticking door. Spend 10–15 minutes evaluating the door and its components.
Start by sliding the door back and forth to pinpoint where it sticks—note if it’s catching at the top, bottom, or sides. For top-hung doors, check the upper track for debris like dust, hair, or small objects that might obstruct movement. For bottom-rolling doors, inspect the lower track for similar blockages, as well as any dents or bends that could impede sliding. Use a flashlight to examine hard-to-see areas, ensuring you don’t miss hidden debris. If the door is off its track, gently lift it (for top-hung) or push it up and out (for bottom-rolling) to check the rollers for wear or damage—worn rollers may need replacement, but this guide focuses on more common fixes.
Take a timestamped photo of the door, track, and any visible issues to document the condition before starting, protecting you from potential landlord claims of pre-existing damage. If your lease requires landlord approval for fixture adjustments, email them with a brief description of the issue and your plan to fix it, saving their response for your records. This step minimizes risks like track damage, which can cost $50–$200 to repair, according to Angi, and ensures compliance with your lease.

Step 2: Clean and Lubricate the Track and Rollers
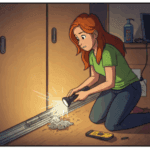
Cleaning and lubricating the sliding mechanism is key to resolving most sticking issues, restoring smooth operation. Dedicate 15–30 minutes to this step to ensure the door glides effortlessly.
Begin by vacuuming the track with a crevice attachment to remove loose debris like dust or hair. For stubborn dirt, dampen a cloth with rubbing alcohol and wipe down the track, using a small brush (like an old toothbrush) to scrub away grime buildup. Pay special attention to corners where debris often accumulates, as even small particles can cause sticking. If the rollers are accessible, clean them with the same cloth and alcohol to remove dirt that might be causing friction—do not remove the rollers unless you’re confident in reattaching them, as misalignment can worsen the issue.
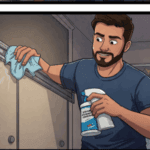
Once the track and rollers are clean, apply a silicone-based lubricant spray to the track, focusing on areas where the door sticks. Spray lightly to avoid over-application, which can attract more dirt, and wipe away excess with a cloth. Slide the door back and forth a few times to distribute the lubricant evenly, ensuring the rollers are coated for smooth movement.
Avoid using oil-based lubricants like regular WD-40, as they can leave a sticky residue, as noted by Family Handyman. Document the cleaning process with photos, showing the cleaned track and lubricated rollers, to prove you’ve handled the repair responsibly. This step addresses the most common cause of sticking doors, preventing potential $100–$300 in damages from a misaligned or forced door, per HomeAdvisor.

Step 3: Adjust the Door Alignment and Test Functionality
Adjusting the door’s alignment ensures it slides smoothly and remains stable for long-term use. Spend 10–15 minutes on this final step to complete your DIY closet door fix.
Check the door’s alignment using a small level placed on top (for top-hung doors) or along the bottom (for bottom-rolling doors). If the door is uneven, locate the adjustment screws on the rollers—typically found at the bottom or top edges of the door, depending on the design. Use a screwdriver to turn the screws: clockwise to raise the door, counterclockwise to lower it, making small adjustments (quarter-turns) until the door is level and slides without catching. For top-hung doors, ensure the rollers are fully engaged with the track; for bottom-rolling doors, confirm the door isn’t scraping the floor.
Test the door by sliding it open and closed several times—it should move smoothly with no resistance. Apply slight pressure to mimic regular use (e.g., pushing harder as if in a rush); if it holds without sticking or derailing, the repair is successful. If the door still catches, recheck the track for missed debris or adjust the rollers further.
Take a final photo of the door in action to document the completed repair, which can be useful if your landlord questions the work. If minor wall scratches occurred during the process, clean them with a damp cloth and a mild cleaner, avoiding $50–$150 in landlord charges for damage, per HomeAdvisor. This step ensures your sliding closet door is fully functional, keeping your rental in top shape.
FAQ: Fixing a Sliding Closet Door
What causes a sliding closet door to stick in a rental?

A sliding closet door may stick due to debris in the track, worn or dirty rollers, or misalignment. In rentals, dust and hair often build up over time, causing friction that hinders smooth sliding.
Can I fix a sticking sliding closet door without violating my lease?
Yes, as long as your lease permits minor renter-friendly repairs. Email your landlord for approval, document the process with photos, and avoid permanent changes to avoid $100–$500 deposit deductions.
What if cleaning and lubricating the track doesn’t fix the sticking?
If cleaning doesn’t work, the door may be misaligned or the rollers may be damaged. Adjust the alignment using the roller screws, or inspect the rollers for wear—replacement may be needed if they’re broken.
How do I prevent my sliding closet door from sticking again?
Regularly vacuum the track to remove debris, reapply silicone lubricant every 6 months, and avoid forcing the door if it catches. These tenant maintenance tips can extend the door’s functionality.
How to replace a smoke alarm battery | Free Guide – RepairBoom
How to unclog a drain in 4 easy steps | Free Guide – RepairBoom