Moving Out: Your Essential Renter Move-Out Checklist for Young Renters
- Moving Out: Your Essential Renter Move-Out Checklist for Young Renters
- Introduction: Why a Strong Renter Move-Out Checklist Matters
- Before You Begin: Key Considerations for a Smooth Move-Out
- Essential Supplies for Your Move-Out Toolkit
- Step 1: Review Lease Terms for Move-Out Obligations
- Step 2: Plan Your Move-Out Timeline and Notify Your Landlord
- Step 3: Handle Repairs and Maintenance
- Step 4: Deep Clean to Meet Lease Standards
- Step 5: Document the Property Condition
- Step 6: Transfer Utilities and Complete the Final Walkthrough
- FAQ: Moving In as a Young Renter
Introduction: Why a Strong Renter Move-Out Checklist Matters
Moving out of your rental marks the end of one chapter and the start of another, but it’s packed with potential pitfalls: deposit deductions, landlord disputes, or surprise fees. At RepairBoom, we’re here to arm young renters with a renter move-out checklist and battle-tested strategies to conquer these challenges and leave your rental with confidence. Our mission is to ensure you exit as a savvy renter, deposit intact.
This guide lays out six critical steps—planning your timeline, reviewing your lease, deep cleaning, handling repairs, documenting the condition, and finalizing utilities—to achieve a heroic move-out in 2–4 hours. You’ll master renter responsibilities, tackle renter repair duties like patching wall holes, and learn how to protect your deposit moving out. From scrubbing floors to dodging utility penalties, our Move-Out Cleaning Checklist and guides are your trusty allies.
Young renters often grapple with tight budgets and landlords who exploit inexperience, charging $200–$1,000 for cleaning, repairs, or pre-existing damage. Our renter move-out checklist equips you to avoid these traps, saving money and stress. Download our free PDF checklist below and let’s make your move-out a triumph!
Before You Begin: Key Considerations for a Smooth Move-Out
Moving out requires preparation to avoid costly mistakes. Consider these factors to protect your deposit moving out:
- Notice Requirements: Most leases demand 30–60 days’ written notice. Missing this can cost $50–$200 or your deposit, as highlighted in our FAQ.
- Cleaning Standards: Incomplete cleaning (e.g., dirty appliances, stained carpets) can trigger $100–$500 deductions, per ApartmentGuide’s move-out checklist.
- Repairs and Maintenance: Unaddressed renter repair duties (e.g., broken fixtures, scuffed walls) may lead to $100–$1,000 charges if landlords handle fixes.
- Documentation: Without move-out photos, landlords may blame you for pre-existing damage, a tactic noted in our Renter Responsibilities guide.
- Utilities: Failing to transfer utilities can incur $25–$100 reconnection fees or lease violations.
- Walkthrough Disputes: A poorly prepared final walkthrough can spark conflicts, delaying deposit returns (14–30 days).
By planning for these, you’ll minimize risks and fulfill renter responsibilities. RepairBoom’s guides, like How to Clean for a Move-Out, are your go-to resources.
Essential Supplies for Your Move-Out Toolkit
Assemble these renter-friendly supplies (~$25–$60) to ace cleaning, repairs, and documentation:
- Cleaning Supplies: All-purpose cleaner, carpet shampoo, bleach, sponges, and trash bags for lease-standard cleaning, per our Move-Out Cleaning Checklist.
- Repair Tools: Screwdriver, putty knife, spackling paste, and sandpaper for renter repair duties like patching wall holes.
- Documentation Tools: Smartphone for timestamped photos/videos, notebook for landlord communications and utility readings.
- Packing Supplies: Boxes, tape, and markers to pack efficiently and avoid leaving items behind.
These essentials ensure you meet lease requirements, avoid landlord charges moving out, and protect your deposit moving out, saving time and money.
Step 1: Review Lease Terms for Move-Out Obligations
Your lease is the rulebook for a successful move-out, but its legal jargon and vague clauses can lead to costly disputes if misunderstood. As the first step in your renter move-out checklist, dedicate 20–30 minutes to thoroughly review your lease to clarify renter responsibilities and protect your deposit moving out. Focus on key sections: “move-out condition,” “cleaning requirements,” “repairs and maintenance,” “notice periods,” and “deposit return.” These outline obligations like providing 30–60 days’ notice, shampooing carpets, or performing renter repair duties such as patching wall holes. Note penalties for non-compliance, which can range from $100 for unapproved repairs to $500 for failing to clean to lease standards.
Pay special attention to notice periods (typically 30–60 days, sometimes 90) and deposit return timelines (14–30 days in most states). For example, a renter who overlooked a clause requiring professional carpet cleaning faced a $250 deduction from their deposit. If terms are ambiguous—say, a vague “return in good condition” clause—email your landlord for written clarification to avoid landlord charges moving out. Reference HUD’s tenant rights page to understand protections against unfair deductions, such as charges for normal wear and tear (e.g., faded paint). Highlight critical deadlines (e.g., notice submission, cleaning completion) and key contacts (landlord, property manager) in a notebook or digital doc.
Store your lease and correspondence in a secure cloud service like Google Drive or Dropbox, ensuring easy access during disputes. Create a checklist of obligations (e.g., “notify landlord by May 1,” “clean oven by June 15”) to guide your move-out plan. This step, supported by our Renter Responsibilities guide, equips you to navigate lease terms confidently, dodge penalties, and lay a solid foundation for the next step: planning your move-out timeline. By mastering your lease first, you’ll minimize risks and protect your deposit moving out, setting the stage for a heroic move-out.
Step 2: Plan Your Move-Out Timeline and Notify Your Landlord
With your lease terms clear, proceed with your renter move-out checklist by planning your move-out timeline and notifying your landlord, ensuring you meet notice requirements and protect your deposit moving out. Based on the lease’s notice period (30–60 days, or up to 90), draft a concise notice letter including your full name, rental address, move-out date, and a request for a final walkthrough to assess the property’s condition. Send it via email with a read receipt or certified mail for proof, storing digital copies in a cloud service like Google Drive. Missing this step can lead to $50–$200 penalties or deposit losses—$500 in severe cases, like a renter who skipped a 60-day notice and forfeited their deposit.
Build a detailed timeline starting 60–90 days out. Allocate 2–3 weeks for packing and decluttering—donate or sell items to cut moving costs. Reserve 1–2 weeks for deep cleaning, targeting kitchens and bathrooms, as detailed in our Move-Out Cleaning Checklist. Dedicate 5–7 days for renter repair duties, like patching wall holes or fixing a squeaky door, to avoid deductions. Set aside 2–3 days for transferring utilities and documenting the property with timestamped photos.
Account for external factors: during peak moving season (May–August), book movers or trucks early to avoid $100–$300 surcharges. Align your move-out with your new lease’s move-in date to prevent $200–$500 in storage or hotel costs, as one renter learned after paying $400 for a week’s lodging due to a timing mismatch. Use a calendar app or notebook to track deadlines (e.g., utility transfers, repair scheduling). This 20–30-minute task, guided by our Renter Responsibilities guide, ensures you fulfill renter responsibilities, minimize risks, and avoid landlord charges moving out for a seamless move-out.
Step 3: Handle Repairs and Maintenance
Tackling minor repairs is a crucial renter responsibility in your renter move-out checklist, preventing $100–$500 deductions for issues like wall damage or plumbing problems. Dedicate 1–2 hours to address renter repair duties that landlords inspect closely. Patch wall holes with spackle, following How to Patch Wall Holes, as unpatched holes can cost $50–$150. Unclog slow drains with a plunger or drain snake, per How to Unclog a Drain, to avoid $75–$200 charges.
Tighten loose cabinet handles, door knobs, or towel racks, and lubricate squeaky hinges, per How to Fix a Squeaky Door, to ensure functionality—landlords may deduct $25–$100 for loose fixtures. Replace burnt-out light bulbs and check smoke alarms, per How to Replace a Smoke Alarm Battery, as non-working alarms can lead to $50–$100 fines.
Always review your lease for repair approval requirements; unapproved fixes (e.g., painting walls) could void your deposit. Notify your landlord in writing about completed repairs, keeping emails or receipts in Google Drive to avoid landlord charges moving out. For major issues, like a running toilet or leaky faucet, report them promptly with photos to avoid liability for damages, which can cost $200–$500 (e.g., water damage from leaks).
Document all repairs with timestamped photos, storing them alongside cleaning photos to prove compliance. For example, a renter who ignored a clogged drain faced a $250 deduction for plumbing repairs. This step, guided by our Renter Responsibilities guide, ensures your rental is in top shape, setting you up for a smooth final walkthrough and helping protect your deposit moving out.
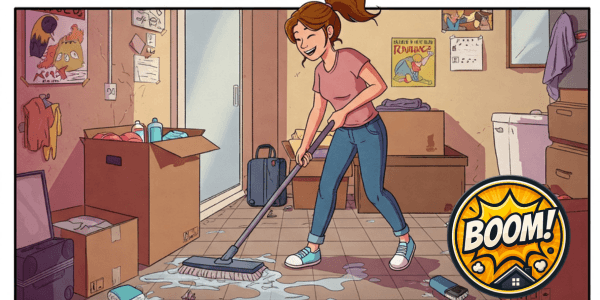
Step 4: Deep Clean to Meet Lease Standards
Deep cleaning is a pivotal step in your renter move-out checklist, ensuring you meet lease standards and protect your deposit moving out. Landlords scrutinize cleanliness, expecting a near-pristine condition to avoid $200–$1000 deductions for issues like greasy appliances, stained carpets, or moldy bathrooms. Dedicate 3–4 hours to a thorough clean, guided by our Move-Out Cleaning Checklist, focusing on key areas landlords inspect:
- Kitchen: Degrease ovens, stovetops, and fridges, including seals. Pull out the fridge and oven (if safe) to clean behind, removing dust bunnies, food particles and grime. Clean inside the fridge, wipe shelves, and scrub sinks, no water spots. Check the wall behind the stove for grease splatters, clean inside cabinets and drawers, and wipe countertops.
- Bathroom: Scour tiles, grout, and fixtures to remove watermarks and soap scum. Clean the toilet thoroughly especially around the toilet base, and remove mold from shower corners, walls and doors with bleach, per How to Clean Mold. Wipe faucets, bathtubs, and shower doors to eliminate grime and water spots, ensuring a sparkling finish.
- Living Areas: Shampoo carpets to lift stains (rent a cleaner for $30–$50), dust baseboards, ceiling fans, and outlet covers, and wash windows, sills and window tracks. Wipe blinds to remove dust and clear spider webs from corners to avoid deductions.
- Walls and Floors: Erase scuff marks with a magic eraser, mop hardwoods like your life depends on it. Take a damp paper towel and wipe the floor after you mop, if it comes up dirty mop again! Clean baseboards to remove dirt and dust bunnies, ensuring they wipe clean.
Document your cleaning with timestamped photos of each area, storing them in Google Drive to prove compliance and avoid landlord charges moving out. Budget $25–$50 for supplies (cleaners, sponges, carpet shampoo), per Consumer Reports’ guide to saving on bills. Note that even with thorough cleaning, some landlords may still impose a cleaning fee, but your diligent effort can minimize or prevent this—unlike a renter who neglected bathroom mold and lost $250 from their deposit. If time’s tight, hiring a professional cleaner for $150–$300 may be more cost-effective than deposit deductions. This step, a vital renter responsibility, ensures a near-pristine exit, aligning with our Renter Responsibilities guide, and primes you for a successful final walkthrough.
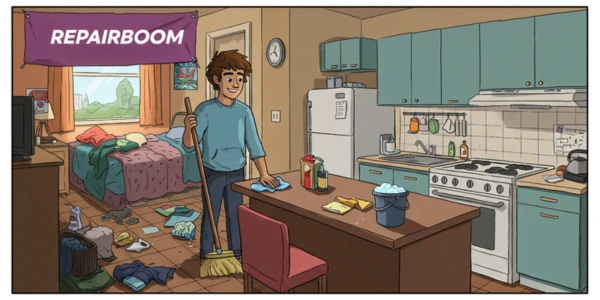
Step 5: Document the Property Condition
Documenting the property condition is a critical renter responsibility in your renter move-out checklist, shielding you from $100–$200 charges for pre-existing damage. Spend 20–30 minutes taking timestamped photos of every room, focusing on cleaned areas (e.g., kitchen appliances, bathroom tiles) and repairs (e.g., patched walls), per Move-Out Cleaning Checklist. Capture floors, walls, fixtures, and appliances, zooming in on potential issues like stains or dents.
Use a smartphone with good lighting to highlight spotless surfaces, such as degreased fridge seals or mold-free shower corners from Step 3. Photograph repaired areas, like unclogged drains or tightened handles from Step 4, to prove maintenance. Include overlooked spots landlords check, like closet interiors, under sinks, or window tracks, as small oversights can lead to $50–$150 deductions. Take wide shots for context and close-ups for clarity, ensuring dates are visible in metadata.
Save photos in Google Drive or Dropbox, organized by room (e.g., “Kitchen_Before_Walkthrough”), and email them to your landlord, requesting confirmation of receipt, to establish a paper trail. Landlords may claim damage without evidence, so this protects you, as one renter discovered after disputing a $150 stain charge with timestamped photos. If possible, take a short video walkthrough to complement stills, capturing continuous proof of condition. This step, vital to avoid landlord charges moving out, ensures you protect your deposit moving out by providing undeniable evidence, per our Renter Responsibilities guide.

Step 6: Transfer Utilities and Complete the Final Walkthrough
Finalizing utilities and the walkthrough is a critical renter responsibility in your renter move-out checklist, ensuring you protect your deposit moving out. Start 3–5 days before move-out by contacting utility providers (electricity, water, gas, internet) to schedule transfers or disconnections, avoiding $25–$100 reconnection fees. Request final bills ($50–$150 for electricity, $20–$50 for water), saving receipts digitally, per Consumer Reports’ guide. Confirm all accounts are closed to prevent unexpected charges, like a renter who paid $75 for an unclosed internet account. Notify your landlord of utility transfers in writing to ensure a smooth handoff.
Schedule a final walkthrough with your landlord, ideally 1–2 days before move-out, to review the property together. Landlords often inspect for cleanliness, repairs, and damage, sometimes nitpicking to justify deductions (e.g., $100–$200 for carpet stains or $50–$150 for scuffs). Bring timestamped photos from Step 5 to dispute unfounded claims, such as pre-existing wear or documented repairs. Be prepared for landlords who may rush the walkthrough or raise minor issues, like dust on a windowsill—address these immediately with touch-up cleaning or quick fixes to avoid landlord charges moving out.
For example, a renter who wiped a baseboard during the walkthrough dodged a $100 cleaning fee. Request a signed walkthrough checklist to confirm the property’s condition, reducing disputes later. Clarify the deposit return process (typically 14–30 days, per state law), noting the landlord’s contact for follow-ups. If delays occur, reference HUD’s tenant rights to enforce timely refunds. This step, guided by our Renter Responsibilities guide, ensures a seamless exit, minimizing landlord conflicts and securing your deposit.
FAQ: Moving In as a Young Renter
Why is documenting the property condition during move-out so important?

Photos prove the property’s condition, shielding you from $100–$300 charges for pre-existing damage. Store timestamped images in Google Drive, per Renter Responsibilities, to protect your deposit moving out.
How do I avoid landlord charges for cleaning or repairs?

Clean thoroughly and handle repairs like patching wall holes. Document with photos to avoid landlord charges moving out ($100–$500), per Move-Out Cleaning Checklist.
Can I make repairs myself before moving out?

Yes, for minor fixes like unclogging a drain, if lease-approved. Document repairs to protect your deposit moving out and avoid disputes, per Renter Responsibilities.
How do I prepare for the landlord’s final walkthrough?

Clean, repair, and bring photos from Step 5 to dispute claims. Address issues immediately to protect your deposit moving out, per Move-Out Cleaning Checklist.

How to replace a smoke alarm battery | Free Guide – RepairBoom
How to unclog a drain in 4 easy steps | Free Guide – RepairBoom

