Moving In: Your Essential Renter Move-In Checklist for Young Renters
- Moving In: Your Essential Renter Move-In Checklist for Young Renters
- Introduction: Why a Strong renter Move-In checklist Matters
- Before You Begin: Key Considerations for a Smooth Move-In
- Essential Supplies for Your Move-In Toolkit
- Step 1: Understand Your Lease and Responsibilities
- Step 2: Set Up Utilities to Avoid Costly Surprises
- Step 3: Locate Critical Systems Like Breaker Boxes and Water Shut-Offs
- Step 4: Complete Your renter Move-In checklist Condition Report with Photos
- Step 5: Report Maintenance Issues Promptly
- FAQ: Moving In as a Young Renter
Introduction: Why a Strong renter Move-In checklist Matters
Moving into your first apartment or house is a major milestone, filled with excitement but also potential pitfalls like confusing leases, unexpected bills, or unresponsive landlords. At RepairBoom, we’re here to empower you as a young renter, providing renter-friendly tools, a renter move-in checklist and knowledge to defend against these challenges and keep your rental in top shape.
This comprehensive guide outlines five essential steps—understanding your lease, setting up utilities, locating key systems, documenting your move-in condition, and reporting maintenance issues—to ensure a heroic start in just 1–2 hours. From mastering renter responsibilities to handling renter repair duties like fixing a squeaky door, you’ll learn how to protect your deposit moving out and avoid landlord disputes. Whether tackling a running toilet or navigating lease terms, our guides, like Renter Responsibilities, are your trusted resources for success.
Young renters often face unique hurdles: tight budgets, limited leasing experience, and landlords who may take advantage of their inexperience with unfair charges or ignored repairs. By following this guide, you’ll sidestep common traps, such as deposit deductions for pre-existing damage or utility shut offs from missed payments. With RepairBoom’s practical advice, you’ll build confidence, save money, and make your new place feel like home. Let’s dive in and set you up for a strong move-in!
Before You Begin: Key Considerations for a Smooth Move-In
- Lease Agreements and Risks: Your lease is a legally binding contract outlining your rights and obligations, but landlords may include vague clauses to charge for repairs or withhold deposits. For example, you could be held liable for damage you didn’t cause if you don’t document it properly, a common issue noted in our FAQ’s.
- Utility Setup Challenges: Failing to activate utilities—electricity, water, gas, or internet—can lead to service disruptions, reconnection fees ($25–$100), or lease violations if you’re responsible for these services. Unexpected shut-offs can disrupt your life and strain your budget.
- Property Systems Knowledge: Not knowing the location of your breaker box or water shut-off valve can delay responses to emergencies like power outages or leaks, risking damage that landlords might hold you responsible for, impacting your deposit or charging you back.
- Move-In Documentation: Skipping the move-in condition report or forgetting to take photos leaves you vulnerable to unfair deposit deductions for pre-existing issues, like scratches or stains, a tactic used by unscrupulous landlords, per our renter responsibilities guide.
- Maintenance Reporting: Delaying reports of maintenance issues, such as a clogged drain or mold in the bathroom, can worsen problems, making you liable for costly repairs or lease penalties.
By addressing these considerations, you’ll lay a solid foundation to protect your deposit moving out and navigate your rental with confidence. RepairBoom’s guides, like How to Patch Wall Holes and How to Unclog a Toilet, are here to support you every step of the way.
Essential Supplies for Your Move-In Toolkit
To start your move-in strong, gather these renter-friendly supplies to handle documentation, maintenance, and emergencies. These essentials, costing ~$20–$50, prepare you to defend your rights and maintain your rental:
- Notebook and Pen: For recording lease details, utility contacts, and completing the move-in condition report. A dedicated notebook keeps your information organized for quick reference.
- Flashlight: To locate breaker boxes, water shut-offs, or other systems in poorly lit areas like basements or closets, ensuring you’re ready for emergencies, per our My Power Went Out guide.
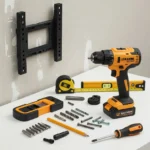
- Basic Toolkit: Includes a screwdriver, tape measure, pliers, and wrench for minor renter repair duties, such as changing a light bulb or tightening a shower head.
- Cleaning Supplies: All-purpose cleaner, sponges, and bleach for initial cleanup to meet lease standards, adaptable from our Move-Out Cleaning Checklist. These also help tackle issues like household ants.
With these tools, you’ll be equipped to document your rental, perform basic maintenance, and stand up to landlord challenges, saving time and money from the start.

Step 1: Understand Your Lease and Responsibilities
Your lease is the rulebook for your rental, but its legal terms can be complex, sometimes leading to misunderstandings that challenge renters. As part of your renter move-in checklist, take 20–30 minutes to read it carefully, focusing on sections like “repairs,” “maintenance,” “tenant obligations,” and “move-out requirements.” These outline your renter responsibilities, such as performing minor renter repair duties (e.g., patching wall holes or replacing a smoke alarm battery) and reporting major issues like a running toilet to your landlord. Look for clauses on utilities, alterations (e.g., mounting a TV), or penalties for unreported damage, as unclear terms can cause disputes and risk your ability to protect your deposit moving out.
For example, some leases require maintaining appliances, reporting pest issues like ants within 48 hours, or setting up utilities to avoid utility shut-off as a renter, with non-compliance potentially leading to $50–$200 fines or lease issues. If terms are unclear, email your landlord for written clarification and store it with your lease—digital or physical—for easy access. You can also review federal tenant protections on HUD’s tenant rights page to understand your rights against unfair lease practices. Highlight key contacts (landlord, property manager) and note deadlines, like move-out cleaning requirements from our Move-Out Cleaning Checklist. This step ties to your move-in condition report, as understanding repair obligations helps you document pre-existing damage to protect your deposit moving out.
Some landlords may misinterpret lease terms, charging for repairs that aren’t your responsibility or deducting from deposits for unclear reasons, like a $300 pre-existing carpet stain you can’t disprove. By mastering your lease, you’ll navigate these challenges confidently, fulfill your renter responsibilities, and stay prepared with RepairBoom’s Renter Responsibilities guide.

Step 2: Set Up Utilities to Avoid Costly Surprises
Utilities—electricity, water, gas, and internet—are essential for your rental, but mismanaging them can lead to costly surprises like shut-offs or landlord disputes. At least 7–10 days before move-in, contact providers to activate services in your name, confirming start dates, deposits ($50–$200 for new accounts), and estimated monthly costs ($100–$300, depending on usage). Set up autopay or budget billing to prevent missed payments, which can trigger reconnection fees ($25–$100) or lease violations if utilities are your responsibility.
For tips on reducing utility costs, see Consumer Reports’ guide to saving on bills. Ask about shut-off policies (e.g., 30-day grace periods after a missed bill) and keep your landlord’s contact info if utilities are shared, as some leases penalize lapses in shared systems.
Common problems include forgetting to transfer utilities from the previous tenant, leading to surprise bills ($100–$500), or assuming the landlord covers water or gas, only to face a shut-off. For example, a young renter might overlook a $150 electricity deposit, causing a blackout during their first week. To prevent this, verify lease terms, call providers early, and save confirmation emails or texts for proof. This 30–40-minute task fulfills your renter responsibilities, ensuring uninterrupted services and defending against landlord complaints or unexpected costs to avoid utility shut-off as a renter. If you face a power issue later, check our My Power Went Out guide for troubleshooting tips.

Step 3: Locate Critical Systems Like Breaker Boxes and Water Shut-Offs
Knowing your rental’s critical systems is vital for handling emergencies and fulfilling renter responsibilities, such as renter repair duties. On move-in day, spend 15–20 minutes locating these key points with a flashlight, making this a key part of your renter move-in checklist:
- Breaker Box: Usually in a closet, basement, or utility room, this controls your rental’s electrical circuits. Label each circuit (e.g., “kitchen outlets,” “bedroom lights”) to prepare for outages, as detailed in our How to Reset a Breaker guide. A tripped breaker can cut power, and not knowing its location delays fixes, risking possible adverse action from the landlord.
- Water Shut-Off Valve: Often near the water heater, under sinks, or outside in the front yard, this stops water flow during leaks. Learn how to turn it off with our How to Turn Off Water to Your House guide. A hidden valve can turn a small leak into a $500–$2,000 water damage disaster, so contact your landlord if unsure.
Take photos of these locations and store them on your phone or cloud for quick access, ideally alongside your move-in condition report photos. Missing these systems can leave you vulnerable to damage claims from landlords, who might deduct repair costs from your deposit if you’re deemed negligent. For example, a renter who can’t stop a leak might face mold issues and then be held accountable for “failure to report,” costing hundreds. Mapping these systems ensures you’re ready to act fast, aligns with renter responsibilities, and helps protect your deposit moving out, giving you peace of mind as a savvy renter.

Step 4: Complete Your renter Move-In checklist Condition Report with Photos
The move-in condition report (ICR) is your best defense against landlords who charge for pre-existing damage, ensuring you can protect your deposit moving out. Within the lease-specified timeframe (typically 3–7 days), complete the report provided by your landlord, meticulously noting every issue—scratches on floors, stains on carpets, chipped countertops, or loose fixtures—with detailed descriptions. For help filling it out check our guide – The Essential Move-In Condition Report | Repairboom.com
Use your smartphone to take clear photos or videos of each room, zooming in on problem areas, and timestamp them for credibility. Store these in a secure cloud service like Google Drive or Dropbox, and email a backup to yourself. This documentation clarifies renter repair duties, proving what damage wasn’t your fault, and is a critical part of your renter move-in checklist to protect your deposit moving out.
Landlords often charge for undocumented issues, charging $200 for a pre-existing carpet stain or $150 for a wall dent, leading to unfair deposit deductions. For example, a renter who skips this step might lose $500 from their deposit for damage present before move-in. Spend 30–40 minutes on this task, submit the report on time, and confirm receipt with your landlord via email to avoid claims of non-submission. This step fortifies your defense against deposit disputes and sets a strong foundation for your tenancy, supported by RepairBoom’s Renter Responsibilities guide.
To maximize your move-in condition report’s impact, conduct a thorough inspection on move-in day, checking high-risk areas like kitchen appliances, bathroom fixtures, and walls for signs of wear, such as cracks or water damage that could worsen without maintenance, like a leaky faucet. Note issues that could affect utilities, such as faulty outlets, to avoid utility shut-off as a renter if repairs are delayed. If your landlord resists acknowledging pre-existing damage, reference your lease’s repair clauses and share your photos, keeping all correspondence for your records. This proactive approach strengthens your renter responsibilities, prevents disputes, and aligns with our Move-Out Cleaning Checklist for a consistent strategy to protect your deposit moving out.

Step 5: Report Maintenance Issues Promptly
Timely maintenance reporting is a core renter responsibility, preventing small issues from escalating into costly problems that landlords may hold you accountable for, undermining your ability to protect your deposit moving out. As part of your renter move-in checklist, regularly inspect your rental for issues like a leaky faucet, mold in the bathroom, or a jammed garbage disposal. Report these to your landlord within 24–48 hours via written notice (email, certified letter) or their maintenance portal, including detailed descriptions and photos, ideally stored with your move-in condition report.
Keep records of all communications, as landlords may ignore requests or claim you failed to report, risking liability for escalated damage or failure to avoid utility shut-off as a renter if issues affect power or water.
For example, an unreported leak can cause $500–$2,000 in water damage, which a landlord might deduct from your deposit, citing negligence. Check your lease for reporting timelines, as some require immediate action to fulfill renter responsibilities. If your landlord delays or ignores reports, escalate using strategies from our Renter Responsibilities guide, such as contacting a tenant advocate or exploring legal remedies like rent escrow. This ongoing task takes 5–10 minutes per report but saves you from liability, ensures a habitable home, and aligns with your renter move-in checklist for a stress-free tenancy.
FAQ: Moving In as a Young Renter
Why is documenting damage during move-in so important?

Documenting damage with photos during the move-in condition report is an important step in your renter move-in checklist. It clarifies renter repair duties, proving what issues existed before you moved in. This protects you from landlords charging for pre-existing damage, helping you protect your deposit moving out. Always keep copies of your report for evidence.
What should I do if I find damage after submitting the move-in condition report?
If you discover damage after submitting your move-in condition report, document it with timestamped photos and notify your landlord in writing within 7–14 days. Reference your lease’s repair clauses to clarify renter responsibilities. Keep records to protect your deposit moving out. Our Move-Out Cleaning Checklist offers tips to avoid deposit disputes
What happens if I don’t understand my lease terms?

Unclear lease terms can lead to disputes, like fees for unauthorized repairs (e.g., changing a shower head) or missed maintenance. Review your lease, focusing on “repairs” and “tenant obligations,” and request written clarification from your landlord. Keep records to protect your deposit moving out. See our Renter Responsibilities guide for lease navigation tips.
How do I avoid a utility shut-off as a renter?

Activate services like electricity and water before move-in and set up autopay to prevent missed bills, fulfilling your renter responsibilities. Confirm provider policies on disconnects and keep landlord contact info if utilities are shared. This avoids lease violations and shut-off fees. Check our My Power Went Out guide for troubleshooting.
What if my landlord ignores my maintenance requests?

If your landlord ignores requests, like for a running toilet, send written notices with photos via email or their portal, keeping records. Check state laws for remedies like rent withholding, but consult a tenant advocate first. See our Renter Responsibilities guide for escalation strategies.
Can I make repairs myself as a renter?

You can handle minor renter repair duties, like fixing a squeaky door or unclogging a toilet, but check your lease for approval requirements. Notify your landlord in writing and document repairs to avoid disputes. Major repairs are typically the landlord’s responsibility.
How to negotiate lease terms?

Negotiating lease terms can save money and secure better conditions. Research local rent averages, then politely discuss rent, repairs, or pet policies with your landlord before signing. Offer a longer lease for lower rent or request maintenance upfront. Review HUD’s tenant rights page for leverage. Document agreements in writing to fulfill renter responsibilities and protect your deposit moving out. See our Renter Responsibilities guide.
How do I handle a landlord charging for pre-existing damage?
If a landlord charges for pre-existing damage, dispute it in writing with photos from your move-in condition report to protect your deposit moving out. Review your lease to confirm renter repair duties and request an itemized bill. Seek tenant rights group help if unresolved, per our Renter Responsibilities guide.
How can I prepare for emergency repairs as a renter?

Prepare for emergencies by locating your breaker box and water shut-off valve on move-in day, as part of your renter move-in checklist. Learn to use them with our How to Turn Off Water to Your House and How to Reset a Breaker guides. Report issues promptly to avoid utility shut-off as a renter and protect your deposit, per our Renter Responsibilities guide.
How to replace a smoke alarm battery | Free Guide – RepairBoom
How to unclog a drain in 4 easy steps | Free Guide – RepairBoom